This stage deals with applied fabric techniques, or applique.
Applique is a technique commonly used to assemble fabric pieces into a composition.
The stitching can be done by hand or with a sewing machine.
I prepared a series of samples to demonstrate the different techniques, or types of applique, before creating a sample based on my drawings.
Here are some examples of cushions that I have made recently:
Cushion 1:
This was made with fabrics from Moda, the cushion is approximately 16" square.
The flowers and leaves were stitched by machine.
The centres were stitched by hand.
The borders are made up of 1" squares pieced together.
 |
| Applique cushion |
The centre of the flower had the edges turned under before stitching by hand.
The flower and the leaves look like they have been stitched by hand, but my machine has some nice stitches that I occasionally use - this one looks like blanket stitch.
The flower has been outlined in a 'double' blanket stitch, the leaves in a single blanket stitch
 |
| close up detail |
Cushion 2:
This was a demonstration piece for a workshop on hand quilting that I ran.
The cushion is a simple Hawaiian quilt design, it is the Breadfruit Leaf design.
There are four methods used when constructing and designing a Hawaiian quilt:
- Use of whole pieces of fabric for the applique and the background.
- The "snowflake" method of cutting the design all at one time.
- The use of usually only two colours of fabric in the design.
- The "echo" quilting which follows the contour of the applique throughout the entire quilt.
It was then placed on top of quilt batting and backing fabric.
These layers were pinned together and then quilted by hand, the stitches following the contours of the applique design.
 |
| Hawaiian quilted cushion |
 |
| Close up of the stitching |
 |
| Close up of the quilting stitches |
---------------------------------
As these pieces cannot be "held" in a sketchbook, I prepared some samples for stage 3.
Sample 1: Applique.
Calico was used for the background fabric, pink and green cottons for the applique design.
The design was traced onto "Bondaweb" (U.S. read Wonder Under): this is a double sided flat sheet of adhesive, that comes with a paper backing.
Bondaweb was applied to the applique fabric pieces, (pink and green fabric), by heating with an iron, and the shapes were cut out.
Once the paper backing has been removed the pieces are placed in position on the calico, they are then heated with an iron to "glue" them to the backing fabric.
They are now firmly in place and the edges will not fray.
The petals and flower centre were then stitched by machine: green flower centre was satin stitched; pink petals were blanket stitched.
I used "stitch and tear" on the back of the piece to stabilise the design and to stop the fabric from puckering. This was removed once the design was complete.
 |
| Applique sample |
Sample 2:Cut-back applique:
This technique is also known as reverse applique.
In its traditional form it is known as San Blas applique, this is in honour of the Cuna Indians from the San Blas Islands off the coast of Panama, who are its best-known practitioners.
The colourful primitive designs decorate the blouses, or molas of the San Blas women.
 |
| Tapir Mola |
Reverse applique involves multiple layers of fabric.
The layers are stacked and shapes are cut away to reveal the fabric layers beneath.
The areas on top are secured at the cut edges by stitching.
San Blas applique:
To produce the intricate work of the San Blas, the work is created from the bottom up, cutting and stitching as each layer is added.
Cut-back applique:
This is used to create simpler designs.
All fabric layers will be basted together, shapes are then cut out from the top layer down, producing larger to smaller "shaped holes".
My cut-back applique sample
I used four fabrics to create this design: Calico on the top layer; pink cotton as the second layer, purple as the bottom layer. The green cotton piece was just a small square inserted under the calico.
Having sandwiched the three layers of fabric together, I drew the design lightly on to the calico.
A small piece of green cotton fabric was inserted under the central circle.
I then stitched around the main parts of the design.
Using a pair of small sharp scissors I cut away the central circle of calico, this revealed the green fabric underneath.
 |
| Starting the cut back applique |
A small petal shape was stitched inside the large pink petals, I then cut away the fabric inside to reveal the bottom layer of purple fabric.
The second layer of pink fabric was then cut away from inside the five long thin shapes to reveal the purple base.
Decorative stitching was added to the central green circle and the background fabric.
 |
| Finished design with background stitching |
I like the reverse side of the design, the sharp contrast of the colour of the stitching.
 |
| The reverse of the design |
The central area had four layers of fabric - another time I may cut away some of the fabric from the back to reduce bulk.
----------------------------------------
Sample 3: Shadow applique
A layer of coloured fabric is applied between layers of transparent fabrics.
I wanted to produce a sample that would allow me to see the effect of several types of fabric using this method.
I used two layers of white crystal organza fabric as my base and top layer.
Applique fabrics (from top clockwise): white satin, white crystal organza, gold dupion silk, black cotton, black net. Centre: green cotton
The first layer of organza was placed on a flat surface.
The shapes were then placed on top. and covered by the second piece of organza.
I decided not to bond the shapes in place.
Having pinned the shapes carefully I proceeded to stitch carefully around each shape, catching the very edge of each piece in with the stitching.
The sample was successful, I now have a record of this type of applique using different fabrics: opaque and sheer.
I was to regret the decision not to bond some of the fabrics - the silk frayed easily as I sewed the edges.
 |
| Shadow applique |
Sample 4: Trapping materials 1
This technique is used by Pauline Burbidge in her quilt "Tone", this has been made from: fabric, petals, feathers, plastic laminate and stitch. You can see the quilt here.
This is my sample;
I used calico as a base fabric and white organza to trap the objects under.
I stitched six rectangles with white thread leaving a small space to insert the different objects through.
Once they were placed under, I finished stitching around the rectangles to seal the objects in.
Top row L-R: Beads, ivy leaf, sequins.
Bottom row L-R: Ivy leaf, hearts, ivy leaf.
 |
| Trapping materials under a layer of organza |
You would be able to add texture and a sense of depth to a textile piece using this method.
-----------------------------------------
Sample 5: Trapping materials 2
For this sample I used 2 layers of white crystal organza, trapping metallic threads in between.
I placed a layer of baking parchment on the ironing board to protect the surface.
A piece of white crystal organza was placed on top.
I placed pieces of a bonding sheet (Steam a Seam) on the surface of the crystal organza and began to snip metallic threads on top.
As the layers of threads built up I added more pieces of the bonding sheet, finishing by placing the top layer of crystal organza over the area.
Covering the whole "thread sandwich" with another piece of baking parchment, I proceeded to heat the area with an iron.
This "glued" the fabric and threads together.
I then added some red metallic stitching to the sample.
The red metallic stitching created a bubbled effect (I had stitched in circles), I have taken note of this for stage 4 - raised and structured surfaces.
 |
| Trapping threads under a layer of organza |
The bonding material that I used did not work as well as I had hoped.
I did not have access to bonding powder (it is somewhere in my house) and the bonding sheet I am able to buy locally is 'sticky' (it was not Bondaweb which is dry to the touch) - this is great for positioning applique pieces, but not for threads.
So although I was able to produce a sample using this technique - I am sure it could work better with the correct tools.
----------------------------------------
Having tried out several of the suggested techniques, I am now going to work with my drawings to produce a main sample for this stage.
Final piece for Stage 3:
Having looked through the development work I did in Stage 2 I narrowed the choices of drawing down to just a few options.
Some pieces of work are well suited to Stage 4, where textured areas will be suited to the techniques used in this section.
I wanted to look for a piece where shape and colour were the predominant areas of the design for this stage.
The drawings I felt were more suitable, due to the amount of texture, to stage 4 are:
Grasses: (to see original comments about this image please refer to project 6 - stages 1 & 2)
I really liked the movement and texture in this piece, and although it may have worked well using a technique such as 'trapping threads', I felt that this may be better suited to try out in stage 4.
It is a piece that I would like to develop in a print technique as well
 |
| Grasses |
I love the texture of this piece, and although it may have worked well using a technique such as 'cut-back applique' (using fabrics:hessians, muslins, calico, I felt that this image will be more interesting to try out using the fabric manipulation techniques of stage 4.
 |
| Tree Bark |
These are three pictures with potential for development - but what I really wanted to use for this stage was simple lines and shapes, little texture.
 |
| Rocks & Aloe |
 |
| Trees |
 |
| Palm leaves |
-------------------------------------
Having ruled these images out, just for this section, these were the images that I was left to work from:
Palm Tree:
The palm tree trunk is such an unusual, natural design as it is.
It could work well in this section using applique techniques or in stage 4 with the fabric manipulation techniques.
 |
| Palm tree |
The stylised image: this would work well trapping fibres and fabrics, also using shadow applique.
 |
| Stylised image |
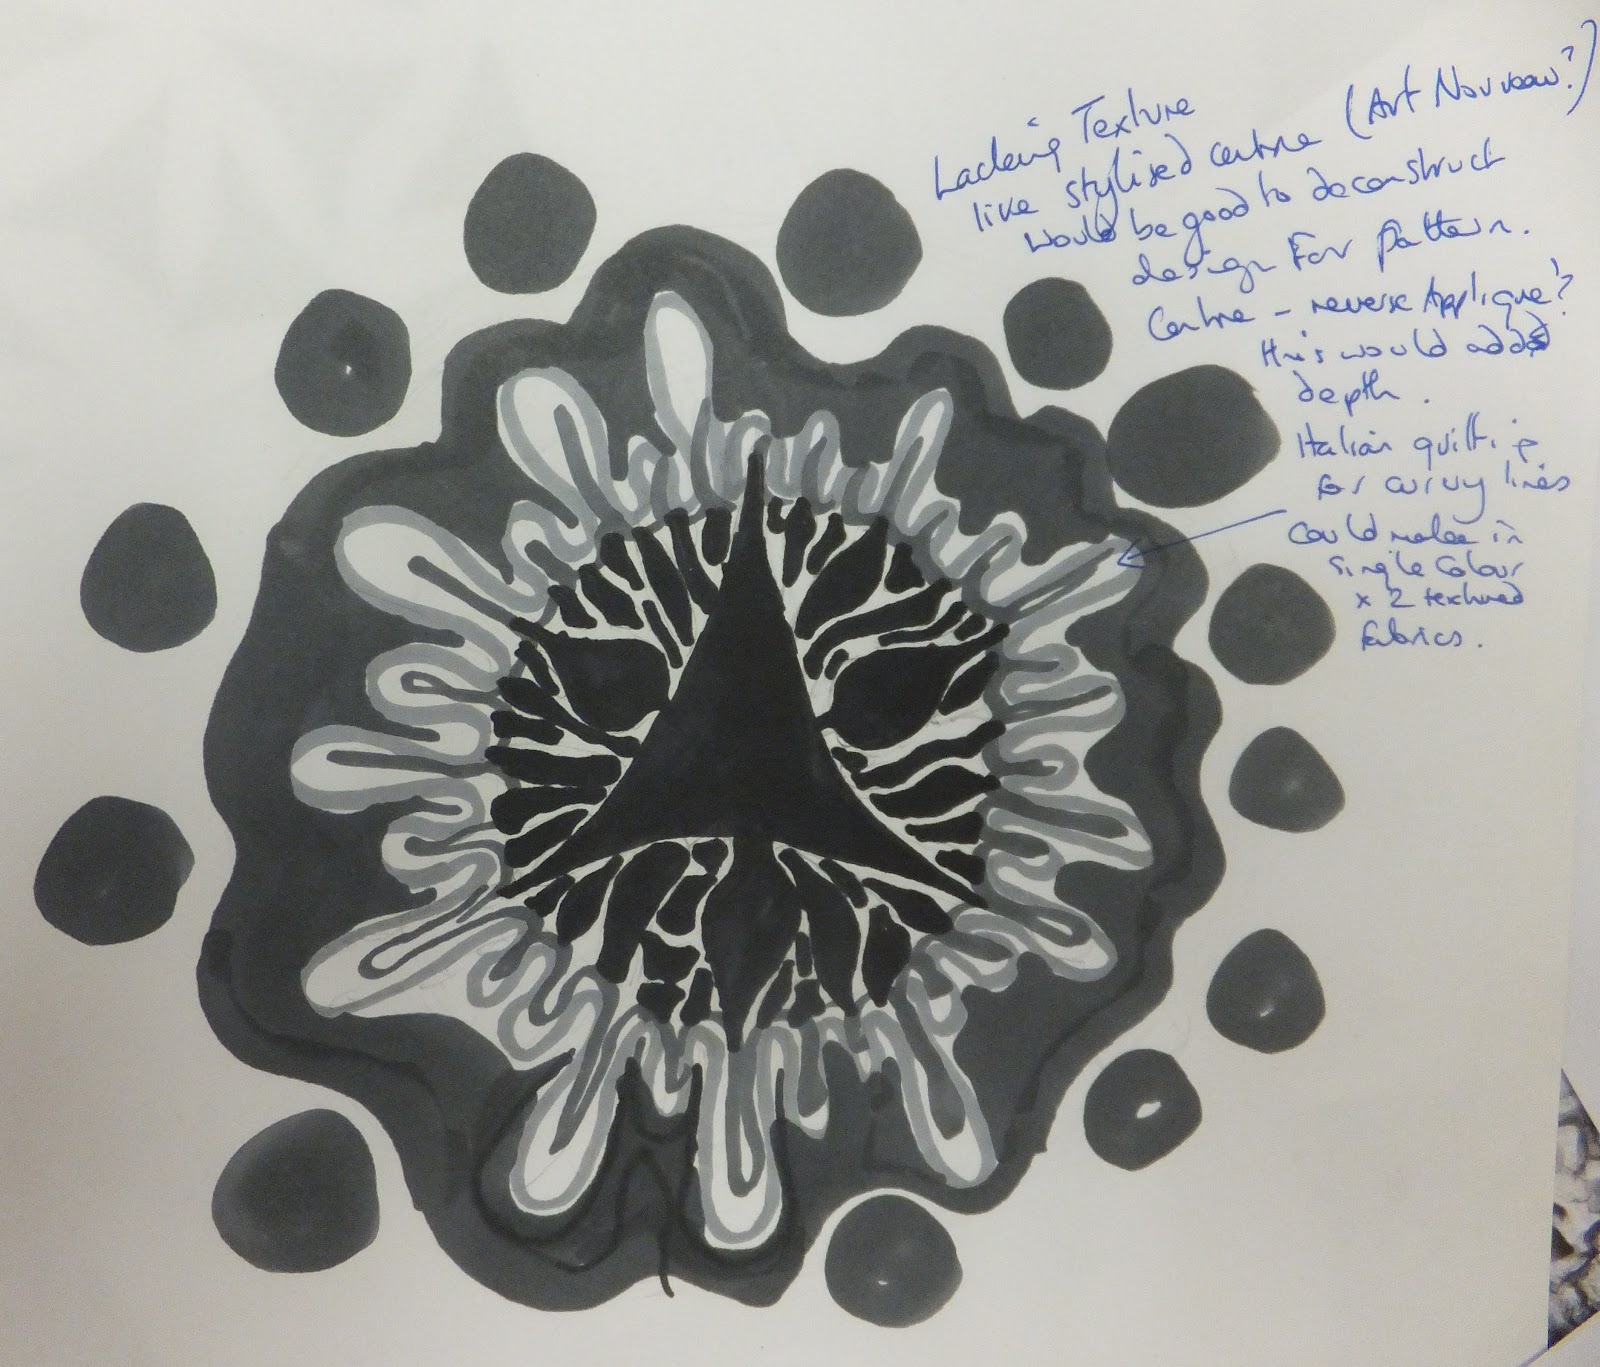
The development work from the abstracted triangles design: this would work well using applique techniques - especially cut-back applique. It would also work well in print.
 |
| Abstract design |
Calm:
This was a piece where the composition of the shapes and the colours used really interested me
 |
| Calm |
For the same reason as the previous piece I decided not to work on this as a sample: it may take up several hours to work on it.
I do realise I could simplify the piece and just work on a small section of it, but I have decided on the image I want to work on.
 |
| Developed design: calm |
This will definitely be kept aside for a future textile piece
I like the combination of the textures and colours, as well as the layout of the composition
 |
| Collage |
Leaves:
This is the image I decided on.
The shapes are simple and graphic.
They will work together in a natural way and create interesting negative spaces.
 |
| Leaves |
One set of four leaves were photocopied in various sizes and arranged on the paper.
Grey parallel lines were drawn on the plain white background.
At the time of creating this my intentions were:
- to add texture to the background fabric.
- to add colour to the image.
- to reverse the positive and negative shapes(add colour to the background, leave the shapes without colour)
 |
| Design created from leaves |
On looking through my collages again, I chose this collage as the one that I would like to work with.
The monochrome colour scheme and the textures of the fabrics seemed suitable for the leaf design.
A simple, graphic leaf shape with a simple graphic colour scheme.
 |
| Peaceful collage |
I then played about with the paper templates and fabrics, placing different pieces of the sample fabrics until I found a combination that I was pleased with.
I knew that I wanted to have some texture in the piece, which would make it tactile and good to touch.
I knew that I wanted to create different layers with the fabrics - so a combination of applique techniques would be used.
The fabrics selected for the applique pieces were: black net and black linen.
Two of the leaf shapes are cut-back applique.
I layered two pieces of net behind the area where the leaf would be stitched.
After pinning the 3 layers together (one layer calico, two layers net), I stitched around the outline of the leaves, twice. (paper templates were pinned to the surface to provide a stitching guide)
Using a pair of sharp pointed small scissors, I cut away the top layer of calico.
The edges were left raw - fraying will occur later, I didn't want a heavy outline for the leaf shapes
Six of the leaf shapes are applique, 3 with net, 3 with linen fabric.
Bonding the shapes onto the calico fabric the shapes were outlined using black thread, the edges were left raw so that some fraying will occur.
One of the shapes is just an outline of the leaves: I felt the design would become too busy with another fabric shape.
Having applied all the shapes I felt that some stitching (the leaf veins) would 'help' the design.
The large leaf shape improved with the stitching - it brought the leaf 'forward' instead of sinking into the background.
I decided to add white stitching to two of the black linen leaf shapes - this also improved the general look of the design.
I left the stitching off the third black linen leaf shape as the design was becoming cluttered - the eye now focusses on that one leaf before travelling around the whole design
I am really happy with the final sample, the colour scheme is peaceful and the design has a lively layout.
The different layers and textures of the applique pieces add depth and interest to the finished design.
 |
| My final sample for stage 3 |
Having completed this sample, I am feeling positive about approaching stage four and excited about trying the different fabric manipulation techniques out.
No comments:
Post a Comment